

To boot from USB, connect a bootable USB drive, restart your computer, and open its boot menu. Select the USB drive and press Enter. On a Mac, use startup options instead.
This guide explains how to boot from USB on Windows, Mac, and Linux, including fixes when the drive does not appear.
Updated November 2, 2026. Menu names and startup keys vary by computer model.
Key Takeaways
- The USB drive must be made bootable with a tool such as Microsoft's Media Creation Tool. Copying an ISO file onto it isn't enough.
- The one-time boot menu is the safest method because it doesn't change your normal boot order.
- Boot menu keys differ by brand and model, so check your PC's manual if the common key doesn't work.
- On supported PCs, Windows Advanced startup offers a USB option without startup key timing.
- Starting from USB is separate from installing an operating system. The tools you run can change files.
What Does Booting From USB Mean?
Booting from USB means starting software stored on a USB drive instead of your internal SSD. That software might be an operating system installer, a recovery tool, or a live Linux desktop.
Your computer's firmware, called BIOS or UEFI, selects the startup device. A drive appearing in File Explorer does not mean the firmware can boot it.
- Installation media starts an installer for Windows or another operating system.
- Recovery media starts tools for troubleshooting, restoring backups, or repairing startup problems.
- A live USB runs a supported operating system for testing without requiring installation.
Opening a USB drive inside Windows is different from booting from it. To start its boot software, select the drive before your usual operating system loads.
What You Need Before You Boot From USB
You need a bootable USB drive, the right key for your computer, and a backup of anything important. Use trusted installation or recovery software, and check its prompts before changing any disks.
- A bootable USB drive. Microsoft's Windows installation media guide calls for a blank USB flash drive with at least 8 GB. Apple says a 32 GB drive has more than enough space for any macOS installer.
- A backup. Copy important files before installing or repairing an operating system.
- The correct installer. Match the operating system and processor architecture to your device. Windows x64 media is not interchangeable with Arm64 media.
- Your recovery key. If BitLocker is enabled, locate your BitLocker recovery key before changing firmware or security settings.
- Power. Plug a laptop into its charger so it doesn't shut down mid-install.
- A direct USB port. Connect the drive to the computer itself, not a hub or dock.
How to Boot From USB Using the Boot Menu
The one-time boot menu lets you pick the USB drive for a single startup. It avoids changing the saved boot order. This is usually the simplest choice for a single installation or repair.
- Save your work, then shut down or restart the PC.
- Plug the bootable USB drive into a port directly on the PC.
- Press the power button, then immediately press the boot menu key for your brand, as listed below. Tap it repeatedly until the menu appears.
- Use the arrow keys to select the USB drive. It may appear under its brand name or as UEFI USB. On a modern UEFI PC, choose the UEFI entry for compatible media.
- Press Enter. Wait for the installer, recovery tool, or live system to load. If prompted to press a key to boot from USB, do so.
| Brand | How to open the boot menu | Source |
|---|---|---|
| Dell | Press F12 right after power-on for the One Time Boot menu | Dell manual |
| HP | Press Esc for the Startup Menu, then F9 for Boot Device Options | HP Tech Takes |
| Lenovo | Press F12 (or Fn + F12) during power-on. Some IdeaPads use the Novo button. | Lenovo Support |
| ASUS laptops | Hold Esc, then press the power button. Release Esc when the menu appears. | ASUS FAQ |
| Microsoft Surface | Hold volume down, then press and release power. Release volume down when spinning dots appear. | Microsoft Support |
Keys can vary by model and age. Desktop PCs with retail motherboards use the key printed in the motherboard manual or shown briefly at startup.
How to Boot From USB in Windows 11 or Windows 10

If the boot key is hard to catch, Windows can restart directly into the USB drive. This works on UEFI PCs that list USB storage as a startup option.
- Plug in the bootable USB drive.
- In Windows 11, open Start > Settings > System > Recovery. In Windows 10, open Settings > Update & Security > Recovery.
- Next to Advanced startup, select Restart now.
- On the Choose an option screen, select Use a device, then pick the USB drive.
Microsoft documents this path in its guide to booting from a USB device. If Use a device or your USB drive is missing, use the one-time boot menu instead.
Use Shift and Restart From the Sign-In Screen
If you can reach the sign-in screen, hold Shift while selecting Power > Restart. This opens the Windows Recovery Environment. Choose Use a device if available, then select the USB drive.
Boot From USB When Windows Will Not Start
You do not need a working Windows desktop to use the hardware boot menu. Create compatible boot media on another computer if necessary. Connect it to the affected PC, power on, and use the startup key in the table above.
If no logo or firmware screen appears, the problem may extend beyond Windows. Follow the computer manufacturer's hardware troubleshooting steps.
How to Change the USB Boot Order in BIOS or UEFI
Changing the boot order makes the PC check USB first on every startup. Use it when you'll boot from USB often, or when the one-time menu isn't available.
- Restart and press the setup key shown at startup or in your manual. F2, F10, and Del are common examples, but keys vary.
- Open the Boot or Boot configuration section.
- Make sure USB boot is enabled. Surface UEFI, for example, has an Enable Boot from USB devices option.
- Move the appropriate USB or UEFI USB entry ahead of the internal drive. Some firmware lists individual devices instead of a general USB option.
- Save changes and exit. The PC attempts to start from that device.
Restore Windows Boot Manager or your normal internal startup entry when you are done. Otherwise the PC tries USB first every time a drive is plugged in.
How to Boot From USB on a Mac

Macs use a startup options screen instead of a BIOS key. The steps depend on your Mac's processor. Choose Apple menu > About This Mac to check.
Mac With Apple Silicon
- Shut down the Mac and connect the bootable USB drive directly.
- Press and hold the power button until Loading startup options appears.
- Select the USB drive and click Continue.
Intel-Based Mac
- Shut down the Mac and connect the bootable USB drive.
- Turn on the Mac and immediately press and hold Option (Alt).
- Release it when you see your bootable volumes. Select the USB drive and press Return.
On an Intel Mac with the Apple T2 Security Chip, Apple says Startup Security Utility must allow booting from external or removable media. Apple's bootable installer guide also notes the Mac needs an internet connection to install macOS from USB.
How to Boot Linux From a USB Drive
On a compatible PC, start a Linux USB through the same one-time boot menu. What you select afterward depends on the Linux distribution.
- Download the Linux image from its official website. Write it to USB using the distribution's recommended tool.
- Connect the drive, restart, and open the PC's boot menu.
- Select the matching USB entry, preferably the UEFI entry on a modern UEFI PC.
- For Ubuntu, follow the startup prompts and choose the option to try Ubuntu when offered. Choose installation only when you intend to install it.
Ubuntu's Try Ubuntu Desktop guide explains how to test the system before installing. A standard live session generally does not retain your changes after shutdown unless persistence is configured.
These PC instructions do not establish Linux compatibility with every Mac. Apple silicon requires hardware-specific Linux support and setup.
What to Do After the USB Drive Starts
Choose the action that matches your goal. Reaching an installer does not mean you must erase your existing system.
- Repair Windows. Use the repair option in Windows Setup to open recovery tools, rather than starting a new installation.
- Install Windows. Follow the installer and confirm the destination drive carefully. Deleting or formatting partitions removes their data.
- Try Linux. Select the live or try option when available. Avoid launching its installer unless that is your goal.
- Restore a backup. Follow your recovery software's instructions and verify the target disk.
See Microsoft's installation media instructions before reinstalling. If setup restarts into the opening screen again, select the internal Windows Boot Manager entry instead of booting the installer again.
Why Is My Computer Not Booting From USB?
Most USB boot failures come from how the drive was made or from a firmware setting. Work through this table before you buy a new drive.
| Problem | Likely cause | Fix |
|---|---|---|
| USB drive missing from the boot menu | The drive isn't bootable, or USB boot is disabled | Recreate it with the official tool and enable USB boot in firmware |
| PC starts Windows as normal | The boot key was missed or the internal drive was selected | Use Advanced startup > Use a device |
| Security or Secure Boot error | The bootloader is not trusted by the current Secure Boot configuration | Use official media, or follow the tool maker's Secure Boot steps |
| Drive works on one PC, not another | Port, hub, or firmware difference | Try another direct port and recreate compatible media. Consult your manufacturer before considering a firmware update |
| Surface ignores the drive | Wrong format or other USB devices attached | Unplug other USB devices. Microsoft recommends FAT32 for Surface boot drives. |
| Mac shows a circle with a line | That macOS version doesn't support this Mac | Create an installer for a compatible macOS |
| USB appears but will not start | Boot mode or processor architecture mismatch | Check the media's UEFI or legacy BIOS requirements and x64 or Arm64 compatibility |
| BitLocker recovery prompt appears | A startup or security change triggered a recovery check | Use the matching recovery key. Avoid making more firmware changes at random |
If the drive is missing in both the boot menu and your operating system, try another port or computer. If it appears in File Explorer but not the boot menu, check how the boot media was created.
Is Booting From USB Safe?
Booting trusted USB media is a normal installation and recovery method. Selecting a startup device does not itself reinstall Windows or erase your disk. However, software launched from that device may access or modify your storage.
The risk comes from what you do next. Windows Setup, disk tools, and recovery utilities can erase partitions when you confirm their prompts. Read each screen carefully, and keep a current backup before you start.
Choosing a Drive for a Bootable USB
Choose a reliable drive supported by your computer and media creation tool. Faster storage can reduce copying and loading time, but it does not fix incompatible boot media.
- Capacity: At least 8 GB for Microsoft's Windows installation media. A 32 GB drive provides space for current macOS installers; some older versions fit on 16 GB.
- Connector: A drive with both Type-A and Type-C plugs fits older PCs and newer laptops.
- Dedicated use: Common media creation tools erase or repartition the selected USB drive. Back it up first and double-check its name and capacity.
An external SSD can be useful for larger recovery environments, but check that your tool supports it. An ordinary flash drive is often enough for an installer.
Common Mistakes to Avoid
- Copying an ISO onto an ordinary USB drive. Use a media creation tool first. Copying an ISO works only with tools designed for that workflow, such as a drive already configured for multiboot.
- Using a USB hub or dock. Some PCs won't boot through them.
- Forgetting to restore the boot order. The PC may keep trying USB first.
- Disabling security settings permanently. Turn Secure Boot back on if you changed it and your new system supports it.
- Clicking through install prompts. Partition and format screens can erase your data.
Frequently Asked Questions
How do I force Windows 11 to boot from USB?
Plug in the drive, then go to Settings > System > Recovery and select Restart now next to Advanced startup. Choose Use a device and pick the USB drive. If that option isn't there, restart and press your brand's boot menu key, such as F12 on most Dell and Lenovo laptops.
Why can't I boot from my USB drive?
The most common reason is that the drive isn't actually bootable. Simply copying an ISO onto an unprepared drive does not create standard boot media. Recreate it with the official tool, connect it directly to the PC, and make sure USB boot is enabled in the firmware. Secure Boot can also block some third-party boot tools.
What is the boot menu key for my laptop?
It depends on the brand. Dell and Lenovo usually use F12. HP uses Esc, then F9. ASUS laptops use Esc held while you press power. Surface uses volume down held while you press power. Your model's manual has the exact key.
Can I boot a Mac from a USB drive?
Yes. On Apple silicon, hold the power button until startup options appear, then select the drive. On an Intel Mac, hold Option at startup. Macs with the T2 chip must allow external boot media in Startup Security Utility.
Does booting from USB erase my hard drive?
No. Booting only starts the computer from the USB drive. The software you run afterward can install a system, edit files, format, or repartition storage. Back up first anyway, because install screens can erase partitions in one click.
Final Takeaway
Knowing how to boot from USB comes down to three things: a properly made bootable drive, the right key or menu, and a direct USB port. Start with the one-time boot menu or Windows Advanced startup, to avoid changing the saved boot order. Use the BIOS boot order only when you need USB first every time.
Storage Options for Your Next Installation
Explore Kingspec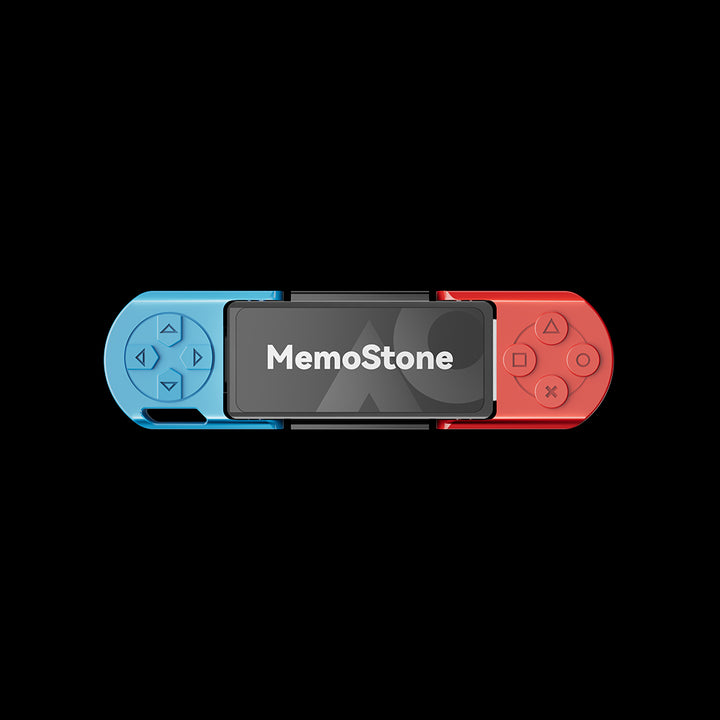
MemoStone US201 Portable External USSD
Compact external storage with Type-A and Type-C connectors. Check compatibility with your media creation tool.
Shop now →
US5 Portable USB External SSD
Portable external SSD with a USB-C connection. Keep backups separate from any drive you plan to erase.
Shop now →
X400 Series M.2 NVMe 2280 PCIe 4.0 SSD
Internal PCIe 4.0 NVMe storage for compatible M.2 2280 systems. This is an installation destination, not a USB installer.
Shop now →
