
Deleting an important photo, document, or video from an SSD feels like a gut punch the second you realize it's gone. The good news: recovery is often still possible if the drive is detected and you stop using it right away. SSDs behave differently from hard drives, though, so every extra download, file transfer, or system update can quietly lower your odds of getting the file back. Grab a portable SSD to use as a safe recovery destination before you do anything else.
This guide covers how to recover data from SSD storage safely, which free tools actually work, and when software alone isn't enough to bring your files back.
Key Takeaways
- Stop using the SSD the moment you notice missing files
- Never install recovery software or save recovered files on the affected SSD
- Check the Recycle Bin, Trash, cloud storage, and backups first
- Recuva, PhotoRec, Windows File Recovery, and TestDisk each solve a different kind of recovery problem
- TRIM can permanently remove deleted data before software ever gets a chance to find it
- A professional recovery service may be your only option if the SSD isn't detected at all
- KingSpec's portable and internal SSDs are worth having on hand for backups and replacements
What to Do Before Recovering Data From an SSD

The first few minutes matter more than any tool you'll download. Avoid changing anything on the affected drive until you've checked your recovery options.
Stop Using the SSD
Stop downloading, saving, editing, or installing anything on the SSD immediately. Don't reinstall Windows, format the drive, or create a new partition. Background tasks can quietly write data to the drive too, so if the missing files really matter, shut the computer down and only reconnect the SSD when you're ready to actually recover the data, ideally on a second computer.
Use a Separate Drive for Recovered Files
You'll need a second storage device with enough free space to hold the recovered data: an external drive, a second internal drive, or a large USB device all work. Never save recovered files back to the same SSD. Doing so can overwrite other deleted files that your recovery software hasn't found yet.
Check Backups Before Using Recovery Software
Look in these places first:
- Windows Recycle Bin or macOS Trash
- OneDrive, Google Drive, iCloud, or Dropbox
- Windows File History
- macOS Time Machine
- Previous Versions in Windows
- A separate computer or external backup drive
Restoring from a backup is safer and usually a lot faster than scanning the SSD. If you don't have a backup habit yet, now's the moment to build one. How to Install Internal SSD: Quick Setup Guide covers setting up a proper backup before you ever open your PC again.
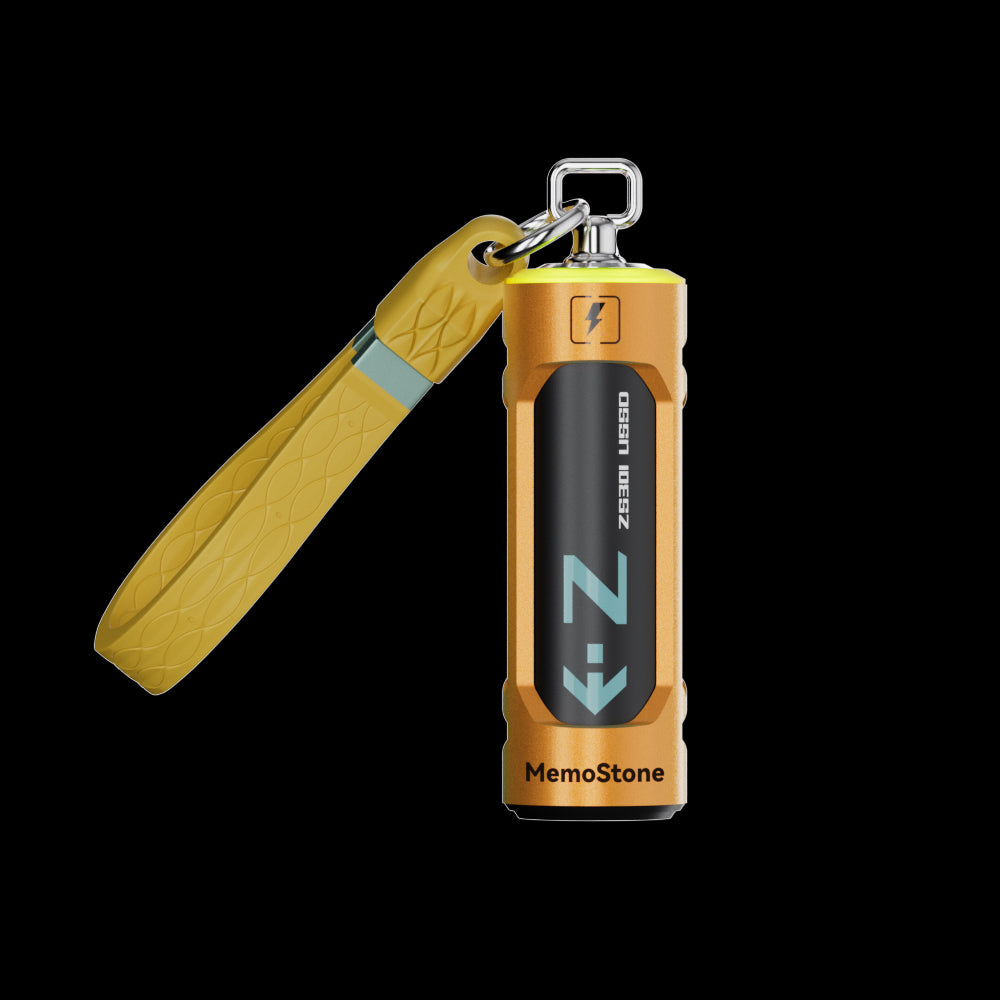
- Interface: USB 3.2 Gen2x2, 20Gbps
- Read Speed: Up to 1,900 MB/s
- Capacities: 256GB up to 2TB
- Design: Battery-shaped body with RGB glow
- Compatibility: PC, laptop, smartphone, tablet
- Warranty: 3 Years
Fast enough to pull a large recovery scan's worth of files off a failing SSD without becoming the bottleneck itself. Big enough capacity to hold a full backup, not just the essentials.
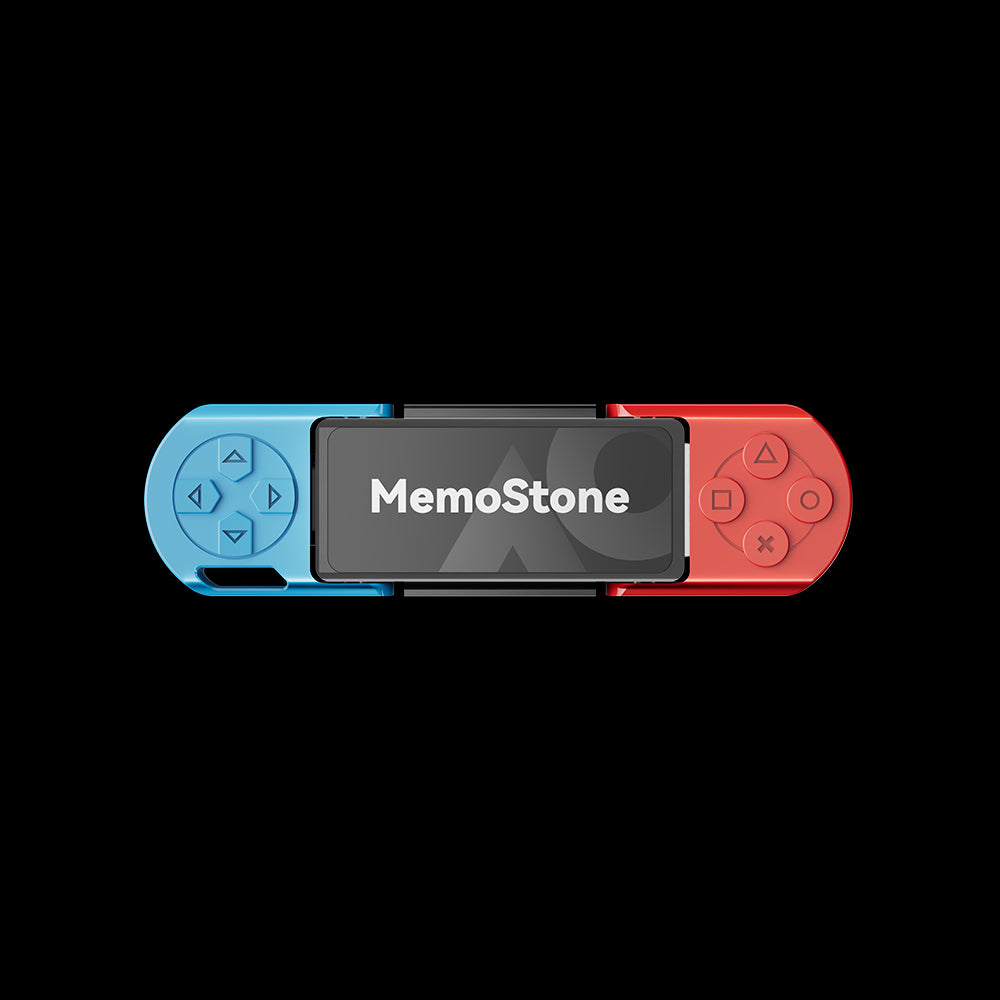
- Interface: Dual Type-A and Type-C, USB 3.2
- Read/Write: Up to 1,030 / 990 MB/s
- Capacities: 256GB to 1TB
- NAND: 3D TLC NAND
- Design: Zinc alloy shell, flip-cover ports
- Warranty: 3 Years
An affordable second drive to keep around specifically for emergencies like this one. The built-in Type-A and Type-C connectors mean it plugs into almost any computer without hunting for an adapter mid-crisis.
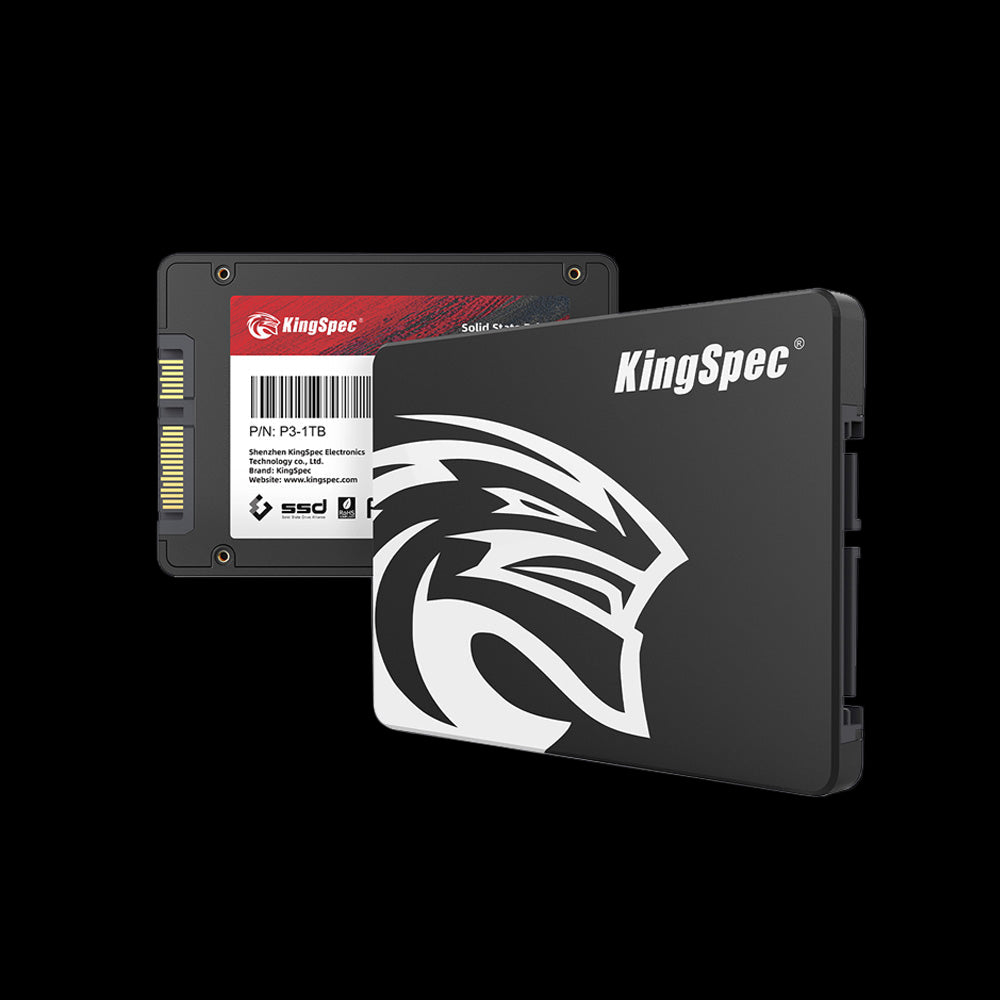
- Interface: SATA Rev.3.2 (6Gb/s)
- Read/Write: Up to 580 / 570 MB/s
- Capacities: 128GB up to 8TB
- NAND: 3D NAND
- Warranty: 3 Years
If recovery confirms the original SSD is failing for good, this is a straightforward, affordable swap for any 2.5" bay, no special tools required.
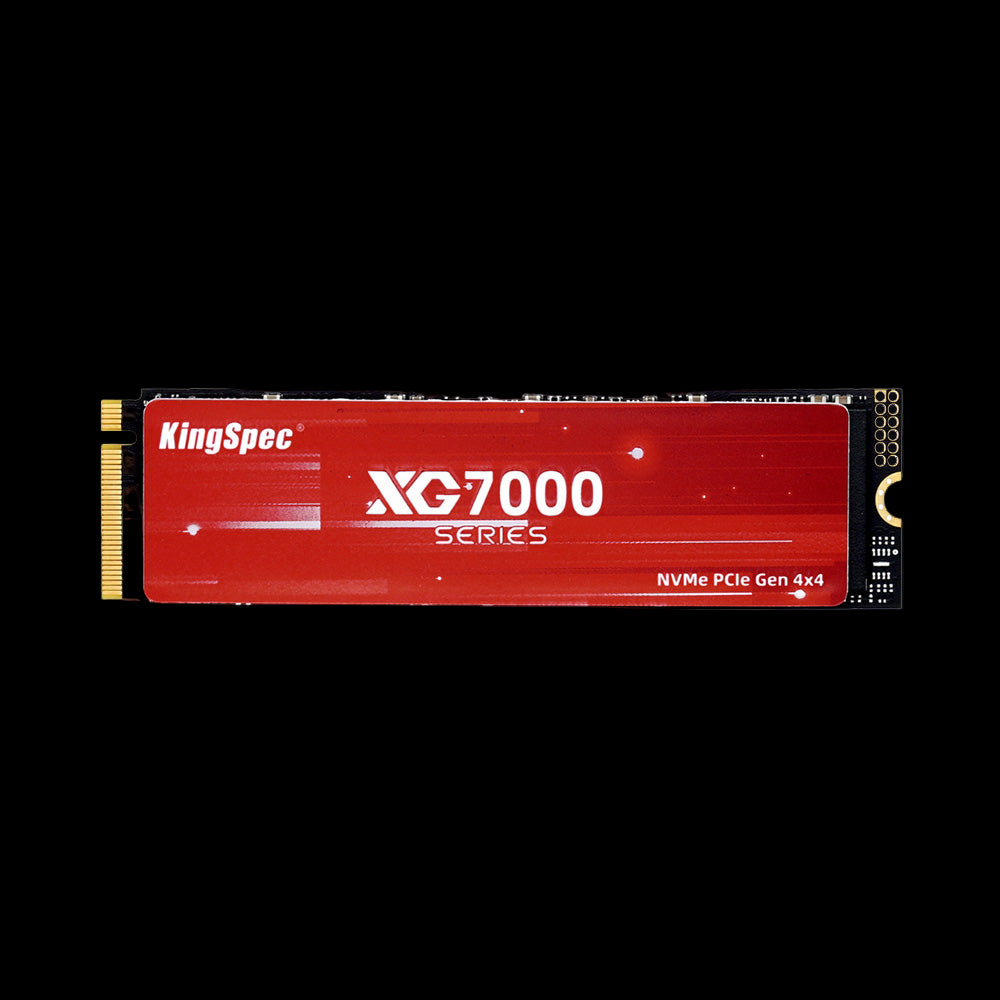
- Interface: PCIe Gen4 x4, NVMe 1.4
- Read/Write: Up to 7,400 / 6,600 MB/s
- Capacities: 512GB up to 8TB
- NAND: 3D NAND
- Warranty: 3 Years
A strong upgrade pick once your files are safely recovered and you're ready to replace a struggling drive with something built for years of heavy use.
Can You Recover Deleted Files From an SSD?
You may be able to recover deleted files from an SSD if the drive still works and the data hasn't been cleared or overwritten yet. Free recovery software can attempt to find documents, photos, videos, archives, and plenty of other file types.
That said, SSD recovery is never guaranteed. SSDs use a feature called TRIM, which tells the drive which blocks are no longer needed. The SSD may clear those blocks later during background maintenance, which can make the files impossible to recover with normal software, sometimes within minutes of deletion.
Why SSD Data Recovery Is Different From HDD Recovery
SSDs Store Data Differently Than HDDs
SSDs store data in flash memory instead of on spinning magnetic disks. That's exactly what makes them fast and quiet, but it also changes what happens the moment a file is deleted, in ways that don't apply to a traditional hard drive at all.
TRIM Can Remove Deleted Data
TRIM helps an SSD manage free space and maintain performance over time. After you delete a file, the operating system may send a TRIM command to the drive. TRIM doesn't necessarily erase data instantly, but the SSD may clear the related blocks later during garbage collection, so deleted files can become unrecoverable sooner than files deleted from most hard drives.
Garbage Collection and Wear Leveling
SSDs move data between memory cells as part of totally normal operation. Wear leveling and garbage collection work behind the scenes of the operating system and can move or clear flash pages without you ever seeing it happen. These background processes make recovery less predictable than pulling files off a traditional hard drive. A deleted file might not sit in its original location for long, which is exactly why avoiding further use gives recovery software the best chance of finding readable data.
Best Free Tools to Recover Data From SSD
Different tools solve different problems. Start with the simplest option that actually matches your situation instead of grabbing the first download you find.
Recuva for Recently Deleted Files on Windows
Recuva is a beginner-friendly Windows option for attempting to recover recently deleted files from the Recycle Bin and supported storage devices. Results vary, especially on SSDs affected by TRIM.
To use it safely:
- Install Recuva on a different drive or another computer
- Connect the affected SSD
- Choose the type of file you want to find
- Select the SSD as the scan location
- Start with a normal scan
- Try Deep Scan if the first scan doesn't find the files
- Preview the results
- Save recovered files to a separate drive
Recuva may not recover files that TRIM has already cleared, no matter how thorough the scan.
PhotoRec for Deep File Recovery
PhotoRec is a free tool for Windows, macOS, and Linux. It scans an accessible drive for recognizable file signatures, including in some damaged or reformatted volumes, which makes it useful exactly when regular recovery software comes up empty.
The main drawback is that recovered files may not keep their original names or folder structure. Use PhotoRec carefully, and select a recovery folder on another drive. The scan can produce a huge number of files, so sorting through them afterward takes real time. PhotoRec cannot recover data the SSD has already cleared.
Windows File Recovery for Command Prompt Users
Windows File Recovery is Microsoft's own free recovery tool. It uses commands instead of a graphical interface, but it can attempt to recover deleted files from supported drives without any third-party software.
A basic example looks like this:
winfr C: E: /regular /n \Users\YourName\Documents\
Here, C: is the source drive and E: is the separate destination drive. Change the drive letters and folder path to match your own computer; these are examples only, and supported file systems and recovery modes can vary, so check Microsoft's current instructions before running any command. Use Regular mode for recent deletions on an NTFS drive. Extensive or Signature mode tends to work better for older deletions, formatted drives, or damaged file systems.
TestDisk for Lost SSD Partitions
TestDisk is the right call when an entire partition has disappeared, for example if the SSD shows as unallocated space or displays the wrong partition information. It's more advanced than Recuva and is mainly designed for lost partitions and partition-table problems rather than recovering individual recently deleted files.
Don't write a new partition table or make other partition changes unless you fully understand what that change will do. If your drive's partition style itself is the confusion, MBR or GPT for SSD: Key Partition Differences and Best Uses explains how the two systems actually work. TestDisk may restore access to a lost partition, but it can't recover data that TRIM has already erased, and it can't repair a physically failed SSD either.
How to Recover Data From SSD Step by Step

This process works best when the SSD still appears normally in Windows or macOS. If the drive is unstable, create a reliable sector-level image first if you have the right tools, or seek professional assistance instead of pushing forward alone.
Step 1: Connect the SSD Safely
If the SSD is external, try one known-good cable, USB port, enclosure, or computer at a time. If the drive repeatedly disconnects or gets unusually hot, stop testing and seek professional advice right away.
If the SSD is internal, you can connect it as a secondary drive in another computer. For an M.2 drive, use a compatible enclosure or an available M.2 slot. Do not initialize or format the SSD if the operating system asks you to. That message often appears when the partition information is damaged, not when the drive is actually empty.
Step 2: Confirm That the SSD Is Detected
On Windows, open Disk Management and check whether the SSD appears. On macOS, open Disk Utility and look for the drive in the sidebar.
If the SSD appears with its correct size, software recovery may be possible. If it shows zero bytes, reports the wrong capacity, disconnects repeatedly, or is missing from BIOS or UEFI entirely, software recovery likely won't work. Hard Drive Not Showing Up: Quick and Easy Fixes covers the detection side of this problem in more depth.
Step 3: Install Recovery Software Elsewhere
Download recovery software only from its official website. Install it on another drive, never on the SSD that actually contains the deleted files. If you only have one computer available, use a second computer or a bootable recovery environment instead.
Step 4: Scan the Physical SSD
Select the full physical SSD if the partition is missing. Select the correct partition instead if the drive structure is still visible. Run a quick scan first when the deletion was recent, and move to a deep or signature scan only if the quick scan comes up empty.
Step 5: Preview and Recover Important Files
Preview files before you recover them. Check file names, sizes, dates, and thumbnails where available. Recover the most important files first and save them to your separate destination drive, then open a few recovered files to confirm they aren't damaged.
If the SSD is failing but still readable, create a sector-level image and run recovery against the image instead of repeatedly scanning the original drive. Professional assistance is the safer call when the files are irreplaceable or the drive itself is unstable.
How to Recover Data From a Formatted SSD
Stop using the SSD right after an accidental format. Don't install a new operating system or copy files back onto it while you're still trying to recover what was there.
Use a recovery tool that can scan the entire physical drive. PhotoRec tends to help when the file system itself is damaged, while other tools may preserve more of the original file names and folder structure. A quick format doesn't always remove every file immediately, but TRIM can make SSD recovery noticeably less successful than hard drive recovery in the same situation. A full format, continued use, or a secure erase can make recovery impossible outright. If you're not sure which format option you're dealing with, How to Format SSD: Step-by-Step Guide for Windows & Mac breaks down the difference.
How to Recover Data From an SSD That Will Not Boot
Boot Failure and Data Loss Are Different Problems
An SSD that won't boot may still contain perfectly readable personal files underneath. The boot problem and the data itself are two separate issues, and treating them as one is how people accidentally make things worse.
Connect the SSD to Another Computer
Remove the SSD if you can and connect it as a secondary drive on a working computer. For an M.2 drive, use a compatible enclosure or an available M.2 slot. Copy important files before you try to repair Windows, since reinstalling the operating system can overwrite data you were still hoping to recover.
Use a Bootable Recovery USB
A Windows recovery USB or a Linux live USB lets you access files without ever starting the installed operating system. Copy the data straight to an external drive. Avoid running repair commands until your important files are safe. Some repair tools change the file system in ways that can make later recovery harder, not easier.
When Free Software Cannot Recover the SSD
Free tools aren't right for every situation. Stop using software and start looking into professional help if:
- The SSD isn't detected by any computer
- The drive shows zero bytes or the wrong capacity
- The SSD repeatedly disconnects during a scan
- The drive becomes very hot
- The files are genuinely irreplaceable
- The SSD is encrypted and the password or recovery key is missing
- Several scans have already failed
A professional laboratory may have specialized equipment for controller, firmware, or memory-chip problems that no consumer software can touch. Don't open the SSD, update its firmware, or attempt board repairs at home. If the drive vanished from your system entirely before you got this far, SSD Not Showing Up? Here's How to Fix It is worth a read before you write the drive off completely.
Common SSD Recovery Mistakes to Avoid
- Installing recovery software on the affected SSD
- Saving recovered files to the same SSD
- Formatting or initializing the drive
- Running CHKDSK or other repair commands before attempting recovery or creating a reliable image
- Reinstalling Windows on the affected drive
- Manually defragmenting or optimizing the SSD during recovery
- Using cracked recovery programs
- Repeatedly reconnecting a failing SSD
- Updating firmware before making a backup
If the SSD holds important deleted files, avoid running CHKDSK or similar repair tools until you've attempted recovery or created a reliable image, since these tools modify file-system metadata. Defragmenting deserves its own callout here too. It's never a good idea on an SSD under normal use, and it's an especially bad idea on a drive you're actively trying to recover data from.
Best Free SSD Recovery Tool by Situation

| Situation | Recommended Tool | Note |
|---|---|---|
| Recently deleted Windows files | Recuva | Best for quick, recent deletions |
| Deep recovery on Windows, macOS, or Linux | PhotoRec | Works across platforms, may lose file names |
| Command-line recovery on Windows | Windows File Recovery | Free from Microsoft, no third-party install |
| Missing partitions | TestDisk | Rebuilds partition structure, not single files |
| Unrecognized or physically failing SSD | Professional recovery service | Software cannot help with hardware failure |
| Encrypted SSD | Correct password or recovery key first | No free tool can bypass encryption |
No free tool can recover data that TRIM has permanently cleared or that you simply can't access because of hardware failure.
Conclusion
Recovering deleted files from an SSD is possible in plenty of cases, but safe handling matters more than trying every tool you can find. Stop using the drive, check your backups, install recovery software elsewhere, and always save recovered files to a separate device. Recuva, PhotoRec, Windows File Recovery, and TestDisk each cover a different kind of recovery problem, so match the tool to your actual situation instead of guessing.
Once your files are safe, it's worth building a backup habit so this doesn't happen again. Browse KingSpec's internal SSD lineup for a reliable replacement drive, and check capacity, interface, endurance, and warranty against your system before buying.
Browse Related Collections
Frequently Asked Questions (FAQs):
Is it possible to retrieve data from an SSD?
Yes, deleted data may be recoverable if the SSD is detected and the blocks haven't been cleared by TRIM yet. Your chances are better when you stop using the drive immediately. Recovery isn't guaranteed, especially after heavy use, secure erasure, or physical failure.
Is it harder to recover data from an SSD?
SSD recovery can be harder than hard drive recovery because of TRIM, garbage collection, wear leveling, and encryption. These features can remove or change deleted data in the background without any warning. Acting quickly is the single biggest thing you can do to improve your odds.
How much does it cost to recover data from a dead SSD?
The cost depends heavily on the type of failure and the equipment needed to fix it. Logical problems are generally less complex than controller, firmware, memory-chip, or encryption issues. Ask for a diagnosis and a written estimate before approving any professional work.
Does an SSD store data permanently?
No, an SSD isn't a permanent archive. Data can be lost through deletion, formatting, corruption, hardware failure, or long stretches without power. Keep important files in at least one separate backup, always.
How much does Geek Squad charge for data recovery?
Prices and available services vary by location and the type of problem involved. Contact the service provider directly for current pricing, and ask whether your SSD is handled in-house or sent out to a specialist laboratory.
What is the best SSD recovery software?
The best choice depends on your specific situation and operating system. A simple graphical tool works well for recent deletions, while a file-carving tool is better suited to damaged partitions or formatted drives. No software can recover data that TRIM has permanently cleared or that's unreachable because of hardware failure.

